Category: travel

travel

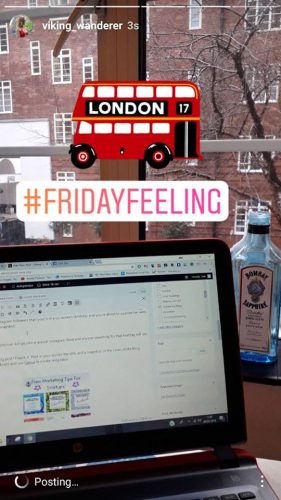
How To Create Memorable Instagram Stories!

I love Instagram stories!

When I was working on some newer insta accounts, we usually had more views on our insta-stories than we did likes on our posts! it just goes to show that video is still the trending media for 2018, and with over 500 million Instagram users, that’s something you want to tap into! 

But with so many stories being released every minute, how can you make sure yours stands out?

Here’s my 4 tips! 

Behind the scenes – Instagram users use Instagram to connect and engage with PEOPLE first and foremost so make your insta stories personable! Are you attending a fashion show or an event?

Use Instagram stories to show your personal journey as a founder. People like to see the face behind the brand and it makes you more relatable. Just remember to ensure that the pictures reflect your brand tone! 


A Day In The Life – Do you have a guest speaker or a training day at work? Film the team and remember to tag in anyone that has more Instagram followers than you! Is it a co-workers birthday and you’re about to surprise her with flowers? Film it or take a snapshot!

Remember any hashtags you use will go into a special Instagram feed and anyone searching for that hashtag will see your picture!

New Blog Post – New blog post? Flaunt it! Post in your stories the URL using Canva’s FREE templates! Once you hit 10K of insta followers, Instagram will let you add an actual URL to link the post directly to the post on your website but until then this method will work!


Pet’s – This is no surprise here but pets are HUGELY popular in any type of content! In fact, one founder’s tweets on her dog ended up getting the most engagement at the end of the month when we went back and looked at our data. So walking the dog on a Saturday? Maybe you are allowed to bring pets into work? Take a snapshot and make them your ‘Mascot’!


So here are just a few ideas to get you started! Good luck!


travel

How to Create the perfect Infographic – FREE templates!

I’ve always been slightly obsessed with Infographics.

It helps that infographics are 3 x more likely to be shared on social media account than any other type of content! 

Add to this that it’s now possible for your website visitors to share your infographic on to their websites creating much-needed deep links! ( Covered in my next post )

So let’s take a look at how to create a simple yet shareable infographic! 

First of all, create a canva account.

Once you have created an account, click on ‘Infographic’.


You will now be offered the choice of free infographic templates in the left-hand column which you can amend yourself! Remember, if they have a $ sign, then you will need to sign up to Canva to receive the full benefits.


You can edit your infographic simple by clicking on either Text, elements or background.

To change colour, simply click on the background tab and then click on the infographic box you wish to amend. You can click on the colour box above the infographic and pick a new colour from the colour wheel or choose one of the colours already listed.


Choosing from the colour wheel.


Let’s have a look at the elements section. You have some brilliant options here! You can upload a photo into one of the infographics sections, change the icons and even add charts for your own data!

Just click on an option and then scroll down to choose. 

To save time you can also add the keywords in the search bar to find the image you would like. I have entered in ‘Laptop’ in this example.


Once again you are offered free images and icons or you can upgrade to use them all.

Lastly, let’s quickly cover the Text section.

What I love most about the text section is there are already text templates to choose from! You can then also change the font colour, size, and style!

Another great aspect of the free canva version is you can even add team members so they can view your creation and edit it if needs be. You simply click on the share tab above the infographic and then type in the persons email address! 


Ready to download your creation? Simply click on the download tab and choose which type of file you wish to download so JPEG etc.


Lastly, once downloaded, all your edited creations will automatically be saved and you can go back in and change them again! I love this as I can add my branding and website URL and then simply change the text and colour! 


Ok, so that was a quick rundown! Any questions or if you need help creating your own just contact me! 


travel

How To Create Facebook Ads Using Your Mailmunch Subscribers

I found this tool incredibly useful, especially as you can upload ANY CSV spreadsheet with contacts on, not just mailmunch!

The thing I love the most about this way is that’s it’s highly targeted to people that are warm leads and may just need that extra encouragement to purchase. Facebook describes this as ‘A Custom Audience from a customer list is a type of audience you can create made up of your existing customers.’

Ok so firstly, go in to your Facebook Ads manager.

Click on Ads manager and then click on more tools. We then go across and select where it says audience.

Now click on Create Audience, then CUSTOM AUDIENCE 

Next select custom file 

Now you have a few options. You can either just upload your form from mailmunch or add customers from your own file. I am going to upload customers from a previously saved CSV file.

Upload your file!

It will tell you when your new customer audience has been uploaded. You can also upload postcodes etc if you have that information.

If you scroll down slightly it will now give you the option to create a lookalike audience or create an ad. Here is the lookalike audience option. As you can see, my newly uploaded custom audience is already here, I just need to add which city ect.

OR I can just create an ad using my newly uploaded audience

So if I clicked on brand awareness, I can then see my newly uploaded audience is already in the ad, I just then need to add the extras!

Ok so hope this helps and let me know if you have any questions!